This tutorial describes the analysis of transcriptome PacBio data with the SMRT tools. The SMRT portal ins installed on the UCONN UHCH cluster accessible in the address: http://smrt.cam.uchc.edu:8080/smrtportal/
Raw PacBio data correspond to a library of sugar pine transcriptome sequencing, SRA accession number SRR3710655, corresponding to a 1 Kb size selected RNA. ( link: https://trace.ncbi.nlm.nih.gov/Traces/sra/?study=SRP034079 )
File description.
Raw PacBio data files include three *bax.h5 files, with the suffix numbered as:
- 1.bax.h5
- 2.bax.h5
- 3.bax.h5
along with *.bas.h5 file, and 1 *.xml file.
Mandatory are *bax.h5 and *bas.h5 files for correct processing.
The sequence IDs in the original formats contain information about the sequencing run itself. The date, time and instrument id is tracked by a ‘m’ prefix; the SMRT Cell barcode, 8 pack number, and other information is tracked by a ‘c’ prefix;
e.g.: m140906_014159_42145_c100684712550000001823142402281596_s1_p0.3.bax.h5
indicates that the sequencing run was started in September 06th 2014 (m140906) at 1:41:59AM (014159) on instrument number 42145, using SMRT Cell ID
Raw files need to be copied in a folder (“folderanalysis”) of the server hosting the SMRT portal. Within this folder, files are copied as follows:
/path/folderanalysis/samplename/*xml
/path/folderanalysis/samplename/Analysis_Results/*.bax.h5
/path/folderanalysis/samplename/Analysis_Results/*.bas.h5
where:
“folderanalysis” is a name of your choice
“samplename” is a name of your choice corresponding to the name of the sample
“Analysis_Results” is a mandatory name (not choice) recognized by the SMRT portal
In my example:
samplename = DCS_1kb
So the folder architeture will look like;
├── DCS_1kb/
    ├── Analysis_Results/
    │   ├── m140906_014159_42145_c100684712550000001823142402281596_s1_p0.1.bax.h5
    │   ├── m140906_014159_42145_c100684712550000001823142402281596_s1_p0.2.bax.h5
    │   ├── m140906_014159_42145_c100684712550000001823142402281596_s1_p0.3.bax.h5
    │   └── m140906_014159_42145_c100684712550000001823142402281596_s1_p0.bas.h5
    └── m140906_014159_42145_c100684712550000001823142402281596_s1_p0.metadata.xml
Importing SMRT cells from samples
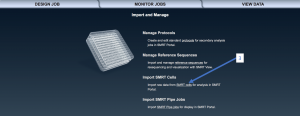
Access the SMRT portal (see above) and log in or register a new account (top right corner). From the three tabs on the top, select “Design Job”. Then select “Import and Manage” from the main menu.

select “Import SMRT Cells”
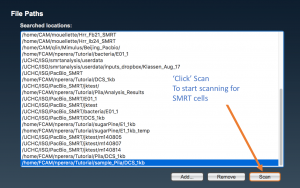
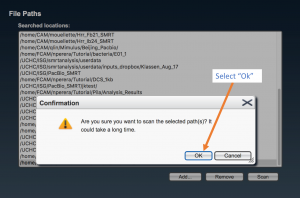
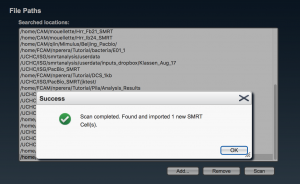
Select the complete path where your samples are located (“folderanalysis”) if it is shown in the list, and press “Scan”. Otherwise, press “Add…”, write the complete path for “folderanalysis”, and proceed to scan SMRT cells.
If all is OK, a message is raised in a pop-up window stating the number of new samples (“samplename”) that have been added. Otherwise review the paths where samples are located.
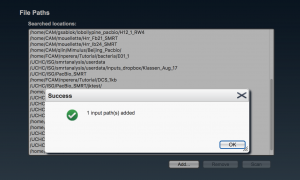
Once the path is added it should display with the rest of the file path(s) in the following window. It can be then selected and be scanned for SMRTCELLs.
Creating a job
From the three tabs on the top, select “Design Job”. From the three main icons select “Create New”.

If a pop-up window appears, select “all analysis”.
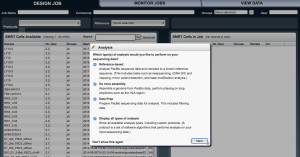
In the “SMRT cells available” box panel, your samples should be showed along with samples from other users. On the top, there are two rows with options.

Set “Job Name” as the name of your job (your choice), “Comments” (optional), from “Groups” section select “all”,
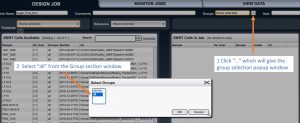
from “Protocols” select “RS_IsoSeq”, and from “Reference” don’t select anything.
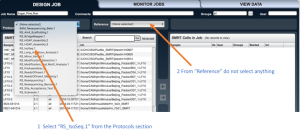
Alongside the “Protocols” option there is a button with ellipsis. Press it to set method options.
A new pop-up window is launched.
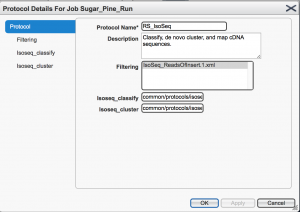
From the left menu, in the “Isoseq_cluster” option check the box “Predict consensus isoforms using the ICE algorithm” and “Call Quiver to polish consensus isoforms”, in order to perform isoform level clustering, and to get polished sequences. Non mandatory options are “Filtering”, where you can specify the minimum number of full passes (during the circular consensus read (CCS) generation) or the minimum accuracy predicted by the SMRT software (0 the lowest, 100 the highest), and “Isoseq_classify”, where minimum length of sequence can be set.
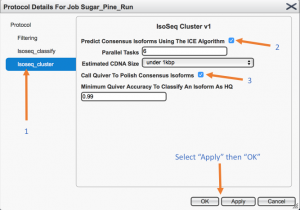
Once you “Apply” the selected options, and then click “OK” the popup window will be closed.
Then from the left panel which is “SMRT Cells available”, using the scroll bar select your SMRT cell of one sample you want to analyze and press the “right arrow” placed in the middle of both panels to load it in the “SMRT cell to the job” box panel.
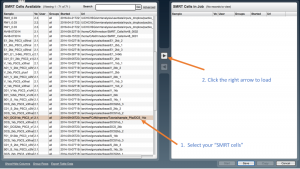
If several SMRT cells are loaded, identical results are retrieved for read of inserts similarly to SMRT cells run independently, but isoform clustering is performed together for all SMRT cells. However, the pipe often crashes if several SMRT cells are loaded. Press the “Save” button, and after “Start” (bottom panel).
Once the job has been submitted, it can be monitored using the “Monitor Jobs” section. Each submitted job will be given a job ID where it can be used to monitor and retrieve data later.

Secondary Analysis Data
This is the data produced by the secondary analysis, which is performed on the primary analysis data generated by the PacBio instrument.
All the files for a specific job will be residing in a one directory specified by the job ID number, and the path to the directory where the job data will be residing can be found at: /UCHC/ISG/smrtanalysis/userdata/jobs/016
The folder structure of job ID 16665 will look like:
016665/
  ├── data/
  ├── results/
  ├── movie_metadata/
  ├── log/
  └── workflow/
where
data/ will contain the intermediate and final files of your analysis job
results/ will contain the summary statics and plots for the analysis job
log/ will contain the log files for the analysis job
workflow/ will contain all the executables for the analysis job

